
Ceramic GPS / GNSS patch antennas
Ceramic Patch Options for Embedded GNSS Receivers
GPS and GNSS ceramic patch antennas are passive receiving elements for embedded positioning devices. Choose one around the receiver bands, available antenna area, PCB ground reference and final enclosure, not from the label “GPS patch” alone.
This page covers ceramic patch elements. If the project needs an LNA, cable, housing, magnet or adhesive-mounted external assembly, start from the GPS/GNSS antenna family instead.
Verified Ceramic Patch Options
The shortlist below is limited to published ceramic patch products. Use it as a starting point; the receiver, PCB, feed, enclosure and mounting position decide whether a model works in the finished device.
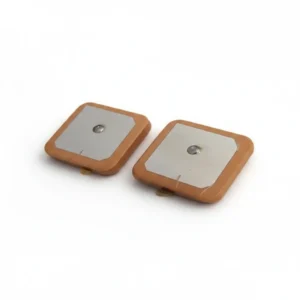
Ceramic patch
GL-DYS2501 GPS Ceramic Patch Antenna
GPS 1575.42 MHz; RHCP; GPS-focused ceramic patch for embedded receiver boards.
Large patch option
GL-DYS2502 GPS/GNSS Ceramic Patch Antenna
1580 +/-3 MHz; RHCP; 70 x 70 mm published size for projects with larger antenna area.
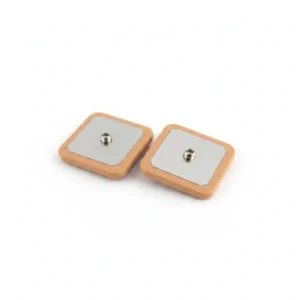
GPS + GLONASS
GL2504 GPS / GLONASS Ceramic Patch Antenna
GPS 1575.42 MHz and GLONASS 1602 MHz; RHCP; 50 ohm; published VSWR below 2.
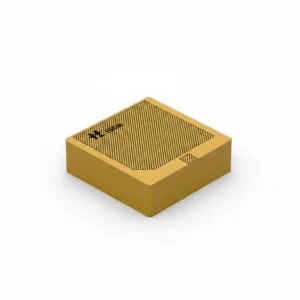
Compact dual-range
GL-DYS18N4 GPS/GNSS Ceramic Patch Antenna
1575.42 +/-3.0 MHz and 1602-1608 MHz compact ceramic patch option.
| Model | Published frequency | Selection note |
|---|---|---|
| GL-DYS2501 | GPS 1575.42 MHz | RHCP; GPS-focused ceramic patch. |
| GL-DYS2502 | 1580 +/-3 MHz | RHCP; 70 x 70 mm published size. |
| GL2504 | GPS 1575.42 MHz and GLONASS 1602 MHz | RHCP; 50 ohm; published VSWR below 2. |
| GL-DYS18N4 | 1575.42 +/-3.0 MHz and 1602-1608 MHz | Compact dual-range ceramic patch option. |
Match the Receiver and Constellations
Start with the GNSS receiver datasheet. Record every band and constellation the product must support, such as GPS L1, GLONASS G1, Galileo E1 or BeiDou B1. A model name containing “GNSS” does not prove coverage of every constellation.
A GPS-only receiver may suit a single-frequency patch. A multi-constellation receiver needs a patch whose published response covers the required ranges. If the design uses a wider or multi-band GNSS architecture, confirm the antenna and front-end together rather than extending an L1 patch beyond its stated band.
Receiver-first selection
Confirm the receiver input, frequency range, matching path, PCB ground reference and enclosure before choosing the ceramic patch size.
Patch Size Is a System Choice
Patch dimensions affect available radiating area and integration, but bigger or smaller is not a complete performance specification. The ground reference, ceramic properties, feed position, matching network and enclosure all change the result.
- Patch dimensions and height
- PCB ground area and layer arrangement
- Feed location and transmission-line geometry
- Clearance from batteries, displays, shields and cables
- Final enclosure material and wall spacing
- Antenna orientation and view of the sky
There is no universal ground-plane dimension that fits every GPS patch and PCB. Use the antenna and receiver integration guidance as the starting point, then test the actual board and enclosure.
GNSS integration
Need help choosing a GNSS or patch antenna?
Tell us your device size, ground plane, constellation, cable and mounting requirements. We can help match active, passive or embedded GNSS antenna options.
Passive Patch or Active GPS Antenna?
Use a passive ceramic patch when it can sit close to the receiver input and the RF path is short and controlled. The design team owns the feed, matching, noise control and layout.
Use an active GPS/GNSS assembly when the antenna must be remote from the receiver, cable loss is significant, or the receiver input expects a powered LNA. Confirm gain, noise figure, supply voltage/current, filtering, cable loss and connector as one signal chain.
An active antenna is not automatically better. Too much gain can overload a front end, and an LNA cannot restore signal lost to poor sky view or strong local interference.
Need an external assembly?
For cabled, magnetic, adhesive or housing-mounted GNSS antennas, compare the broader GPS/GNSS antenna family.
Placement and Validation
Mount the patch in the intended orientation with as clear a sky view as the product allows. Keep switching regulators, high-speed digital lines, displays, batteries and large metal structures away from the antenna region where practical.
Validate after the final board, cable and enclosure are assembled. Useful checks include input match, received satellite signal levels, cold and warm acquisition, tracking stability, multipath behavior and performance across production samples. Accuracy also depends on the receiver, firmware, environment and satellite geometry, so do not assign an accuracy figure to the antenna alone.
For a real deployment example, see the GPS/GNSS patch antenna guide for asset tracking. For other patch technologies and patterns, use the broader patch antenna guide.
What to Send for Model Matching
- receiver/module model and antenna input type;
- required constellations and frequency bands;
- maximum patch length, width and height;
- PCB stack-up and available ground area;
- enclosure material and antenna position;
- passive or active path, cable and connector;
- target application and validation criteria;
- sample quantity and production forecast.
Related GPS/GNSS and Installation Guides
Prepared by the Rftech Technical Team from current model pages and GNSS integration references. Product data checked July 15, 2026; confirm the latest drawing and receiver requirements before layout release.
